Requirements
Installation
New features
License
Align objects [back]
You may align the selected object on one of the other objects of the model. The line shows the position that will reach the selected object. Several buttons allow to align left/center/right or top/center/bottom or both. An "undo" button allows to undo/redo the operation.

Create videos [back]
In the 3D windows, you may create an animation of the shadows from the sunrise to the sunset. You may also animate the view from sun position (next button).

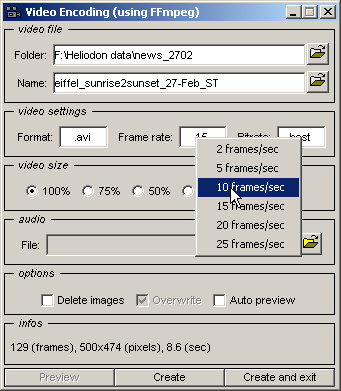
Once the animation is done, click on the "camera" button to create a video file. Select the name and the folder, the type of video (avi, mov or flv), the frame rate and the quality then click on "create" to produce the video file. You may check the video using the embedded heliodon viewer (FFplay) by clicking the "Preview" button or see it with your favourite player.
Here is the flash video (.flv) result. Click on the "Play" button to start.
Linear objects [back]
Click on the "linear object" button. Start drawing a line (the same way you create polygons). Use "O" to close the line and start another line. Use "U" to leave the line opened and start another one.
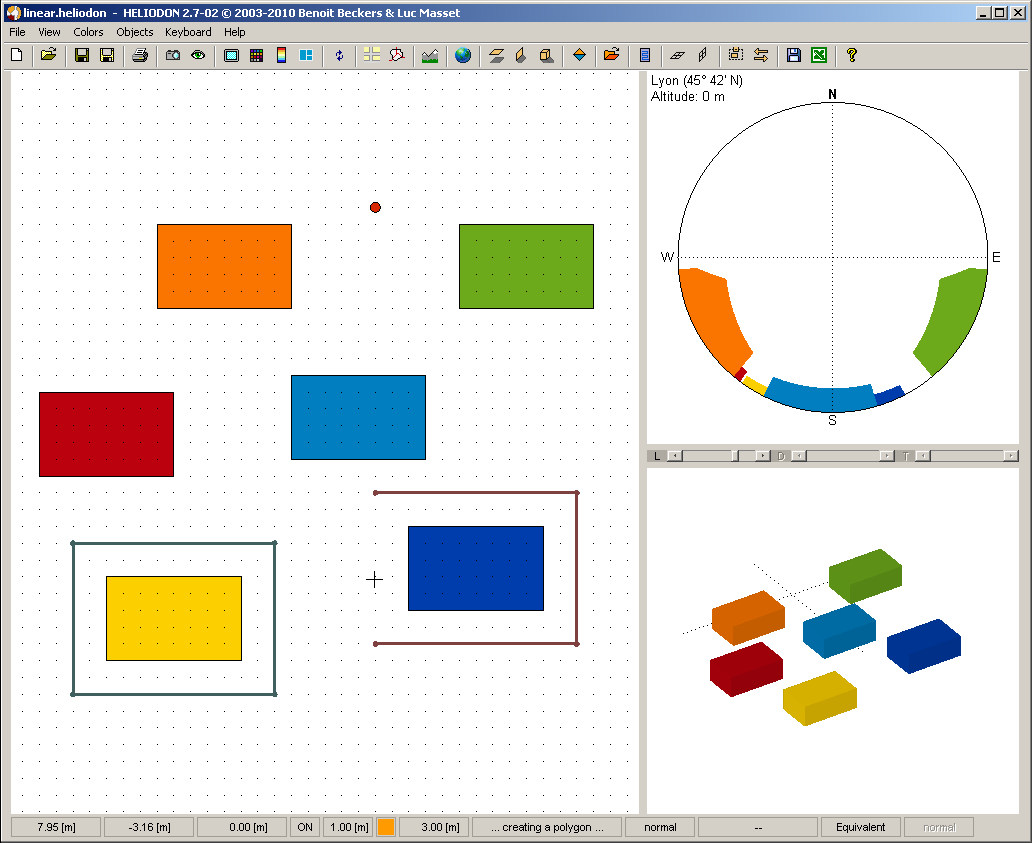
Select the linear object. Set the step size, ie the displacement of the view point along the line(s). Click on the "path" button to produce the animation.

Click on the camera button to create the video file (as described here). Click on the "Play" button to start the video below (flash format .flv).
Add a terrain [back]
You may import a terrain in your heliodon model in several formats (.asc or .xyz). The position of the terrrain is given by the coordinates (in meters) of the points of the file. It is up to you to select at which geographical position (latitude and longitude) the terrain is located. The terrain has an influence on several results in Heliodon: projections (as the stereographic projection below), daylight and energy.

Import free DEM models [back]
You may import and use free DEM (Digital Elevation Models) with a 90 meter precision into Heliodon. A special grapical interface (in Start > Programs > Heliodon menu) allows you to manage the downloaded models. Check the website of the CGIAR-CSI (Consortium for Spatial Information | Consultative Group for International Agriculture Research) for more information. Note that these DEM are free but your are asked to cite the CGIAR-CSI in any published work including the free material they provide.

In main Heliodon window, first select the geographical poisition (latitude and longitude) then click the "Import DEM" button (icon with a moutain). You may select the size (in meters) of the terrain model you will import into Heliodon.

Finally you obtain a terrain model such as below the Mont Blanc region.

Compute daylight and sun energy on terrain [back]
Pressing the "F11" key will launch the computation of the daylight and the sun energy onto the terrain. The period of study is set as for the other maps in Heliodon (use "F7" key). Here is the daylight duration for the summer solstice for the Mont Blanc region.

And this is the daylight duration for the winter solstice.

External models [back]
You may import limits of geographic data (town, regions, roads, ...) with shapefiles. A new linear object is created containing the line or the several lines of the model. The shapefiles used below as examples come from the site of Ile de France (Paris). The commune limits as well as the departments are displayed.

You may also import buildings with shapefiles. The model is first translated into STL model and then imported into Heliodon. The attributes of the shapefile object must contain a "height" (or "hauteur") field to be recognize properly.

If you have a terrain model, you may adapt the vertical position of all buildings by translating them on the ground below it.

Official time [back]
In the town database, several parameters have been added in order to compute the official time in addition to the solar time. These parameters are the longitude, the time zone and the DST (Daylight Saving Time) data.

You may chose between solar (ST) and official time (OT) by right-clicking the time label in the projection space. A (DST) indicates that the current date is within the DST period.

Import GIS images [back]
You may now import GIS images (Geographic Information System) for which the geolocation is set by a World file. For example, each TIFF image available on the site of Ile de France (Paris) comes with an associated file with extension .tfw (.jgw for a .jpg, .bpw for a .bmp, ...). The World file contains required data to position correctly the image in the Heliodon model.
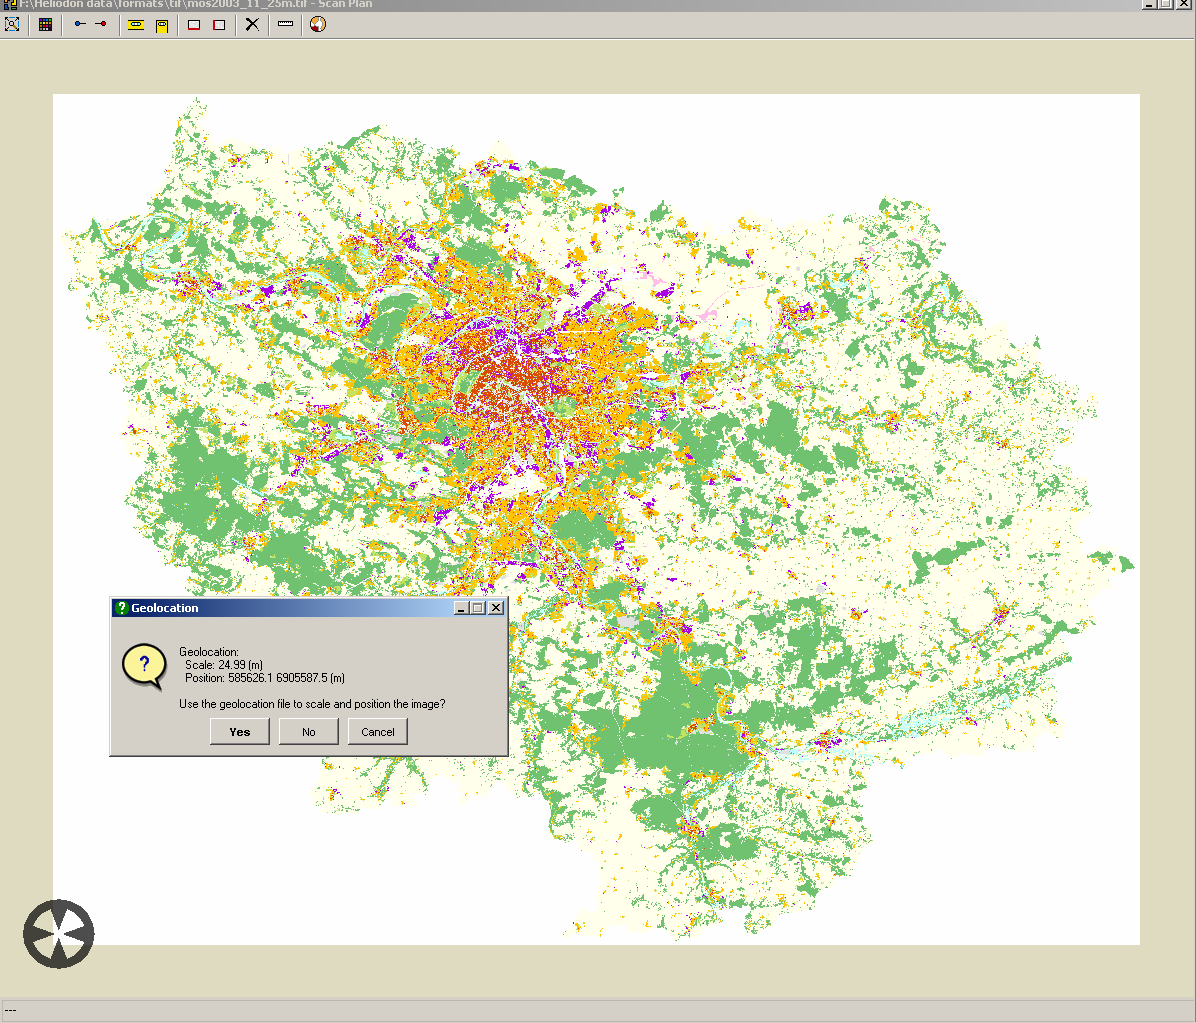
This is how image looks like in Heliodon. On the image below, we have imported the TIFF image as well as the shapefile with the Paris department limits (the lines in blue). As it can be observed, the image is correctly positioned and scaled.

New menus [back]
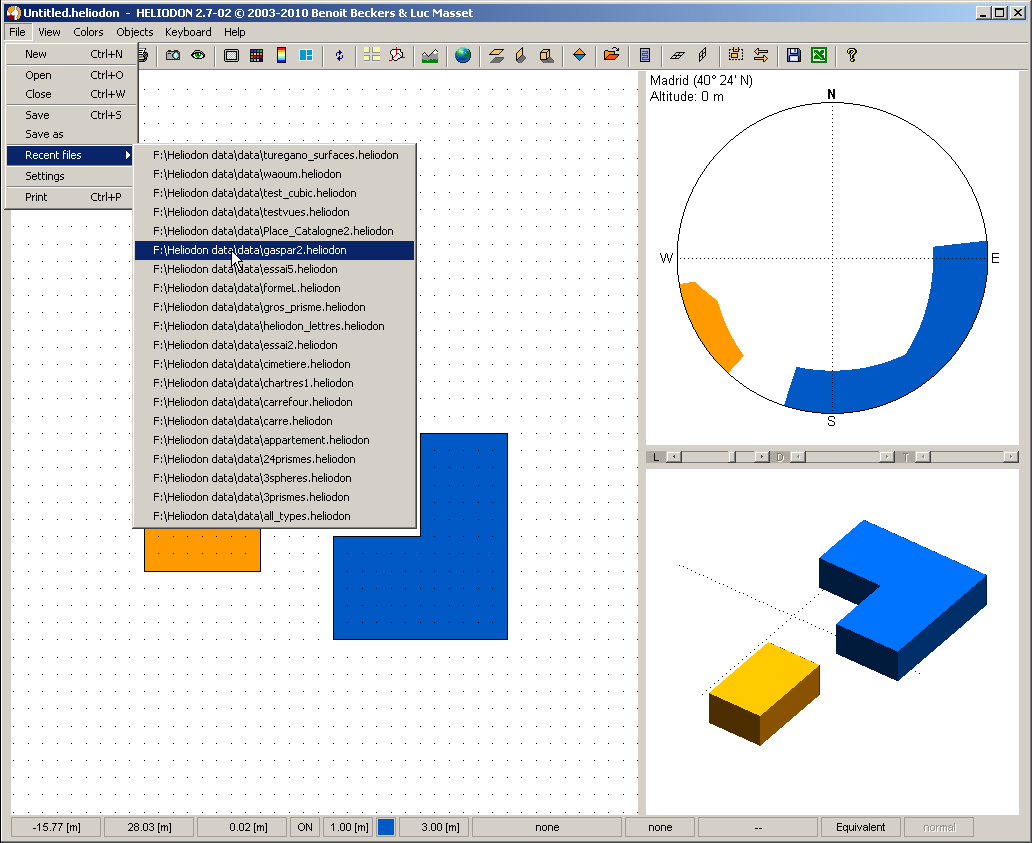
Several menus have been added. You can access the most recent Heliodon models opened.
All the objects of the model as well as the terrain may be accessed thanks to the object menu.

Heliodon uses several external software freely available on the web. We would like to aknowledge their excellent codes that work perfectly inside Heliodon. Here is the list of these codes and their reference.