Google Sketchup is a design tool widely used in the field of architecture. It allows you to easily create 3D models. With the free version of Google Sketchup, you cannot export the model in common exchange file formats (.obj, .step, ...) but there is a free plugin (su2stl.rb, see below) that allows you to export your sketchup model in STL format. STL models may be imported in Heliodon2 so that you can design your own 3D models in Sketchup (or import ready-made models in Google 3D Warehouse) and use them in Heliodon2. The steps are described below.
Didier Bur (CRAI, Centre de Recherche en Architecture et Ingénierie) has written a plugin for Google Sketchup that allows to export the Sketchup model into an STL model (made only with triangles). You may search in the Ruby Library Depot the plugin named su2stl.rb. Download the file into the Google Sketchup plugin folder (Usually C:\Program Files\Google\Google SketchUp 7\Plugins\). Whithin Google Sketchup, you should have a new plugin named "Export to STL".
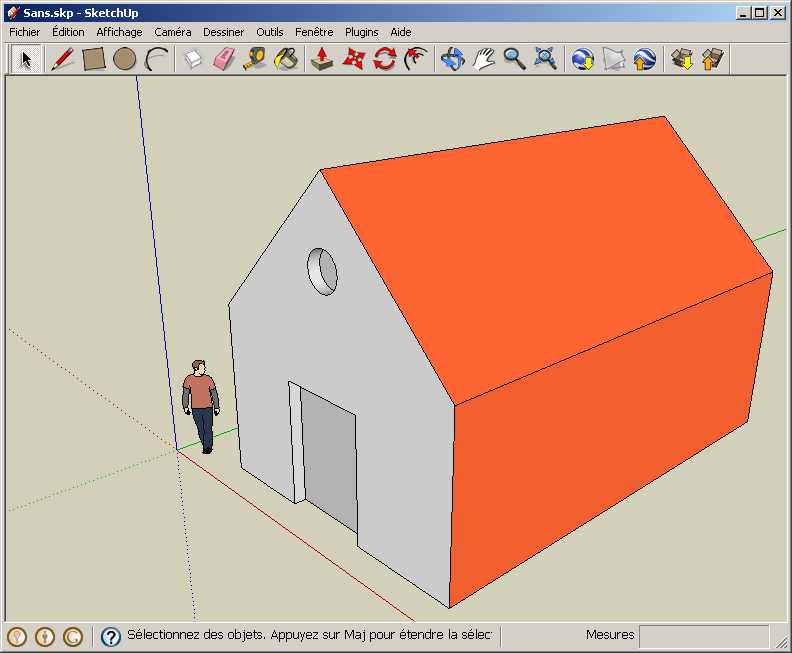
Download here a small Sketchup model, a simple house.
First select the house parts (walls, roof, ...) then run the plugin.

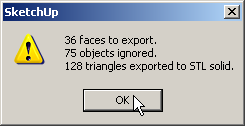
Choose the name for the STL model and the folder then save. A small message indicates the operation status (number of created triangles).
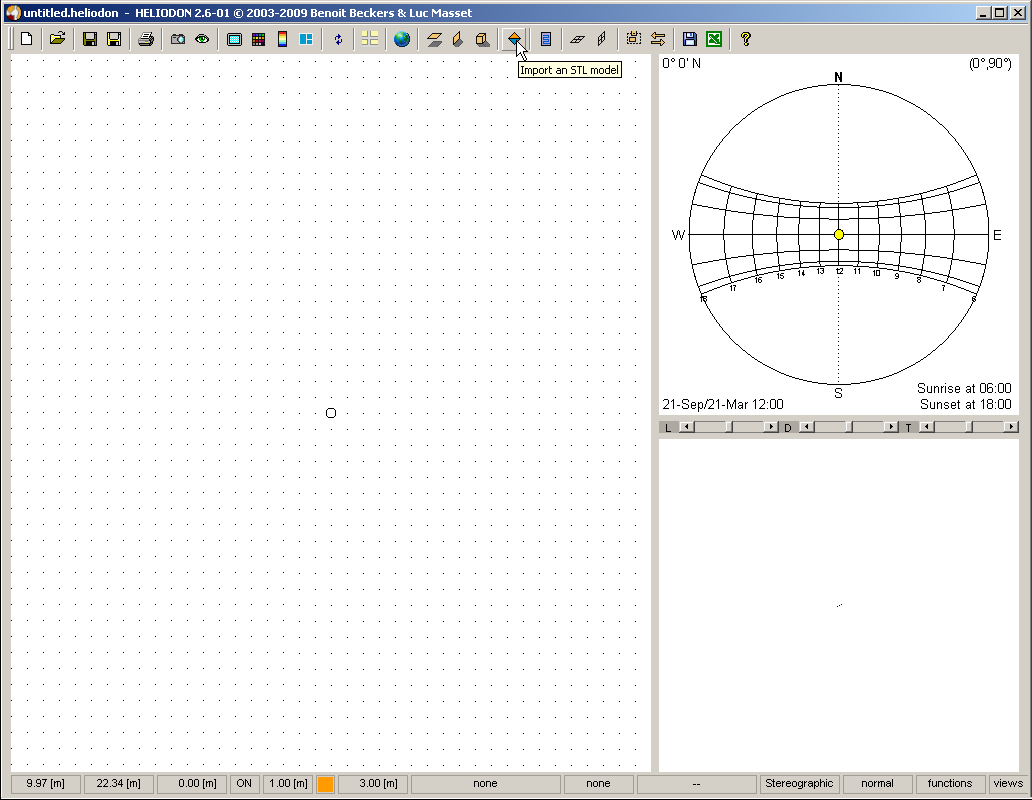
Open Heliodon2 and select "Import an STL model".
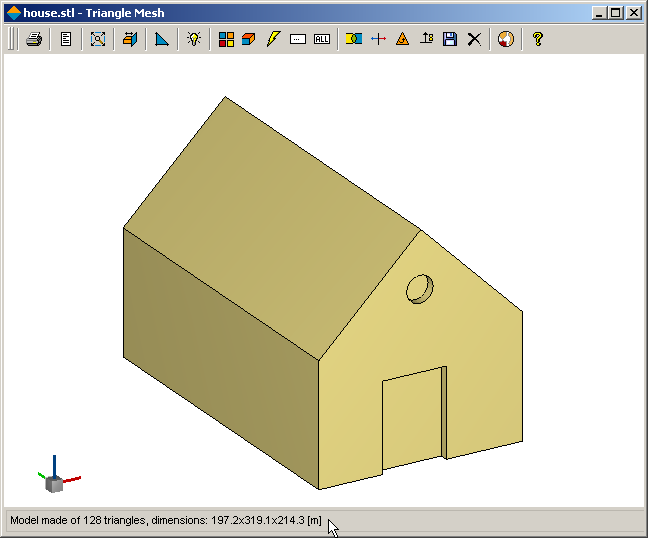
Select the STL model you have created in Google Sketchup. The STL Import window of Heliodon2 brings up. Rotate the model to see its different faces. Notice the model size in the status bar (bottom of the window). By defaut, the lengths are in meters. Here the house was obviously created in centimeters or in inches.
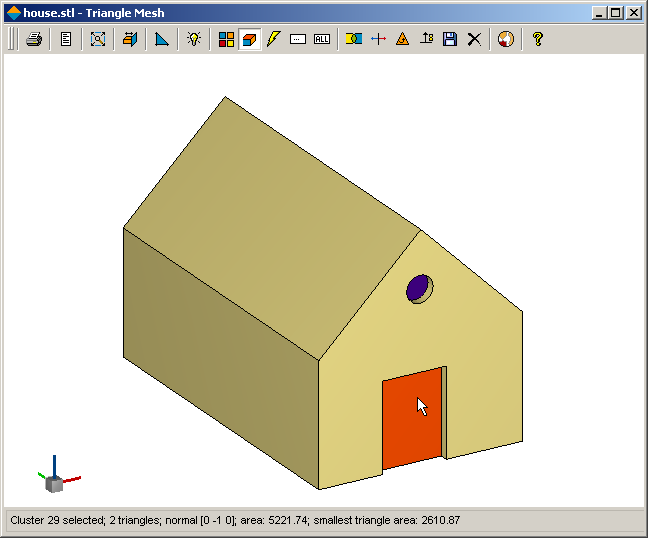
Go in the Graphic Settings dialog and choose "centimeters".
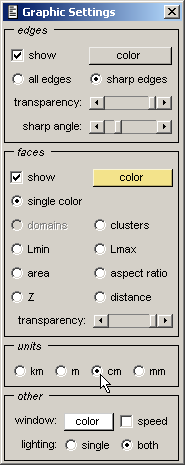
Before returning to Heliodon main window, select two surfaces of the house model - the door and the window. Select the cluster selection tool then double-click on the two surfaces.
Import the STL model in Heliodon (use button  )
and return back into main window. First select a town (Barcelona here).
)
and return back into main window. First select a town (Barcelona here).
Select the model (named "house" here) and edit its properties. Create meshes for all STL faces (defined previously).

Press F9 key. Set mesh size to a smaller value (0.01) to refine meshes.

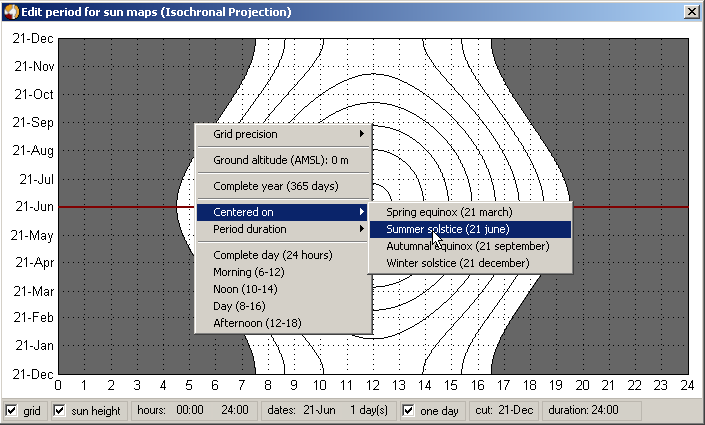
Edit the options for map computation. With the menu, set a smaller grid step (2 min) and select a date (centered on summer solstice, June 21st).
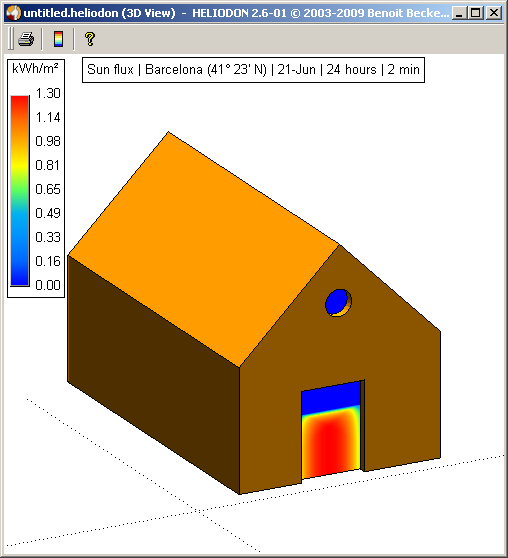
Press the "update" button and you obtain two colored meshes (door and window). Press <3> key to draw the 3D view in a separate window. The solar radiative energy arriving on both surfaces are displayed. Notice that the circle window does not receive any solar radiation since the sun is too high in the sky during all the day on June 21st.
Now change the date to autumnal equinox (September 21st) and launch the computation again. Now the window receives a small amount of solar radiation.

Finally, set the date to winter solstice (December 21st) and launch the computation again. Now the window receives yet more solar radiation.

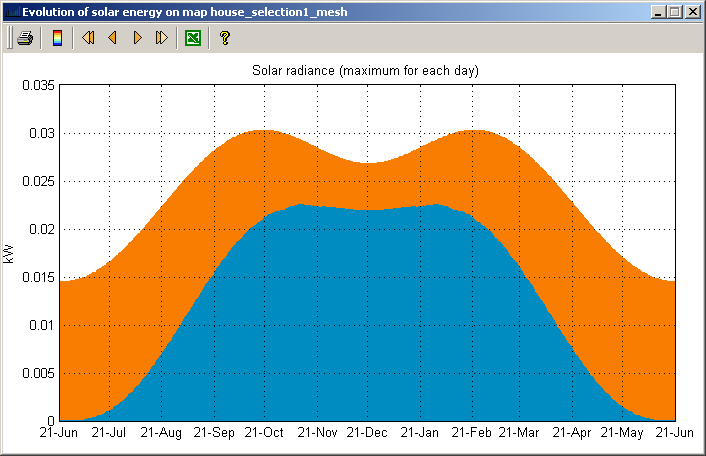
If you check the "evolution" in the mesh properties and select the date to "Complete year", you may obtain the following curves (note that this computation may take several minutes). They represent the evolution of solar radiation during the year. The blue one corresponds to the actual radiation and the orange one to the theoretical one (ie without any other objects). This is for the door.
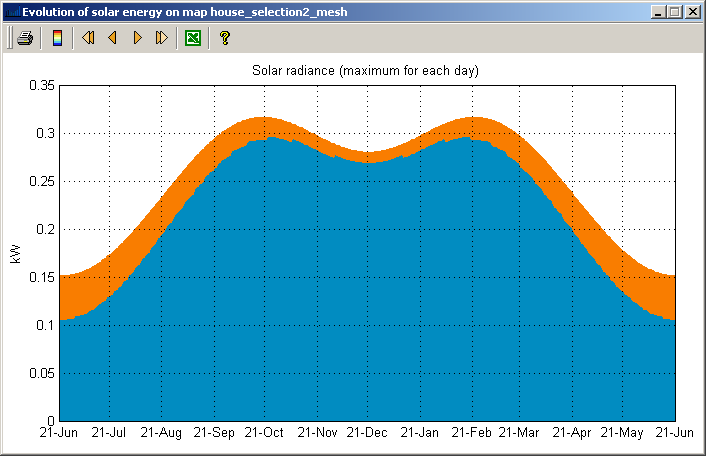
And this is for the window. Near the summer solstice, during almost a month, the window does not receive any solar radiation.